macのvscode+cliでm5stackのファームを開発できる環境を作る
m5stackのプログラムを1つ書くことになった。Arudino IDEはエディタとしては使いづらいのでvscodeでコードを書けるようにしたい。 ここではvscodeにarduino ideの設定を作るまでの過程を残していく。
前提条件
以下の環境を前提にしている
Arduino IDEでM5Stackの開発ができるようにする
vscodeで開発をできる状態を作る前にまずはArduino IDEで開発をできるようにする必要がある。 詳細は公式の情報を見てセットアップをしてほしい。 https://docs.m5stack.com/#/en/arduino/arduino_development
成功するとArduino IDEのシリアルポートの項目に/dev/cu.SLAB_USBtoUARTという項目が現れ、
ボードにM5Stack-Core-ESP32が選択できるようになる。

この状態でArduino IDE上で→ボタンを押すとコンパイルと転送行われM5Stackへの書き込みが成功すればOK
VSCodeでArduino開発が行えるようにする
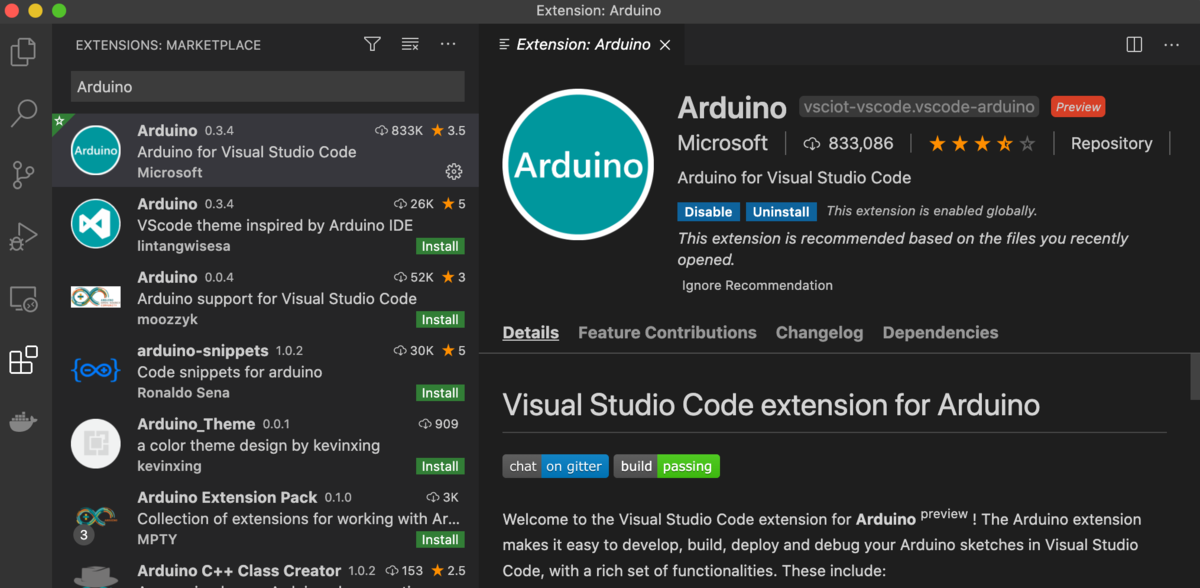
Arduino拡張機能のインストール
vscodeを開き、Arduinoの拡張をインストールする。Arudinoの拡張はMicrosoftが出しています。 Arduinoで検索すると複数の拡張が出てくるがMicrosoftのものを選択しインストールします。
Arduino拡張機能の設定
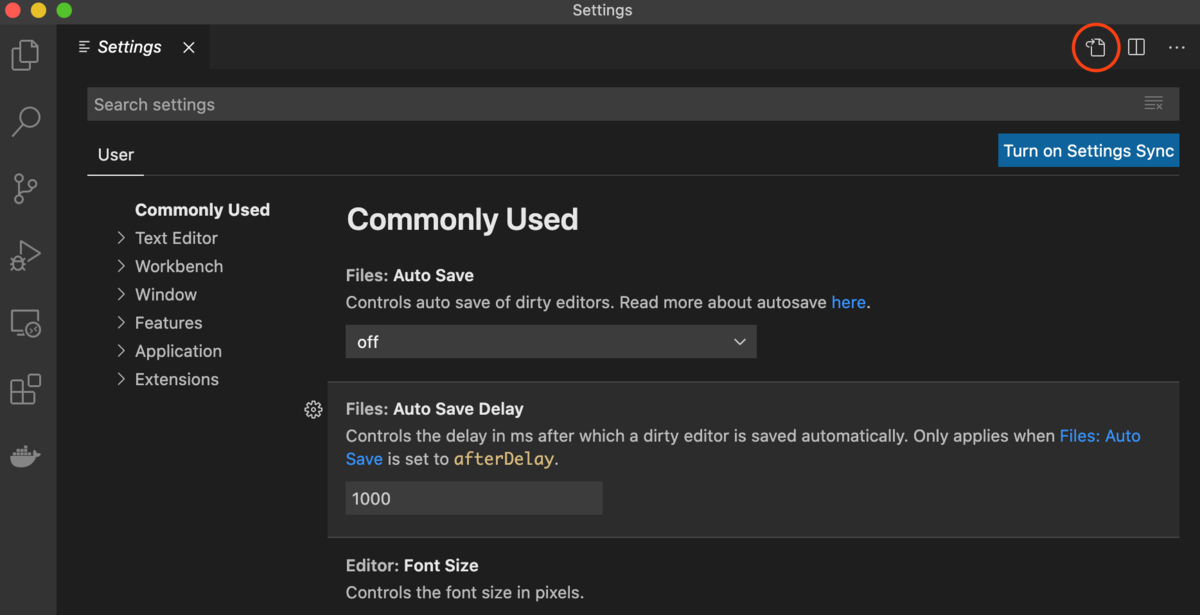
メニューの[Code] > [Preferences] > [Settings]の順にクリックし、設定画面を開く。 右上隅にある[Open Settings (JSON)]アイコンを選択肢、JSONで設定を編集できるようにする。
次の行を追加する。
"arduino.path": "/Applications”,
arduinoのパスとC拡張のインテリセンスエンジンのモードを変えている。
2020.12.9に変更。
arduinoのパスを設定するのみ。
インテリセンスエンジンをTag Parserにする必要があるとの記事がいくつかあったが、私の環境ではTag Parserにするとインテリセンスが正常に動かなくなってしまっていた。
プロジェクトを作成しボードとシリアルポートの設定を行う
適当なディレクトリをvscodeで開き、ディレクトリ名と同じ名前でinoファイルを作成する。同じ名前にする必要があるのは後述するarduino-cliに対応させるため。

次に、[Command + Shift + P] でコマンドパレットを開き、Boardと入力。Arduino: Board Configを開き、Selected BoardをM5Stack-Core-ESP32にする。
同様にコマンドパレットからSelect Serial Portを選択し/dev/tty.SLAB_USBtoUARTを選択する。
フッターが以下のような表示になる。またフッターの該当の箇所をクリックしても設定を行うことができる。

2020.12.9に追記。
.vscode/c_cpp_properties.jsonのincludePathとdefinesに手を加える。
includePath
            "includePath": [
                "${workspaceRoot}",
                "${env:HOME}/Library/Arduino15/packages/esp32/tools/**",
                "${env:HOME}/Library/Arduino15/packages/esp32/hardware/esp32/1.0.4/**",
                "${env:HOME}/Documents/Arduino/libraries/**"
            ],
defines
            "defines": [
                "ESP32",
                "USBCON"
            ],
includePathにはworkspaceRootを付け足したのと、おそらくあったであろう"/Applications/Arduino.app/Contents/Java/libraries/**"を削除している。
削除しているのはesp32で定義されているクラスとArduino.app以下で定義されているクラスが競合しているため。
ついでにHOMEのパスが絶対パスで書かれていたのを${env:HOME}に変えているが通常は不要そうである。
definesにESP32を追加する。M5Stack.hはESP32がdefineされていないと定義が有効にならないため。
これをやらなくても済む方法があるような気がするが。。
このようなdefine,他に必要なものはあるのかな?ということで$HOME/Library/Arduino15/packages/esp32/hardware/esp32/$version/platform.txtを確認したが、ESP32が追加されていれば大丈夫そうであった。
ちなみにbuild.extra_flags=-DESP32 -DCORE_DEBUG_LEVEL={build.code_debug} {build.defines}というところに書かれていて、CORE_DEBUG_LEVELは気にしなくて良さそうだし、build.definesは空っぽだったので問題はなさそう。
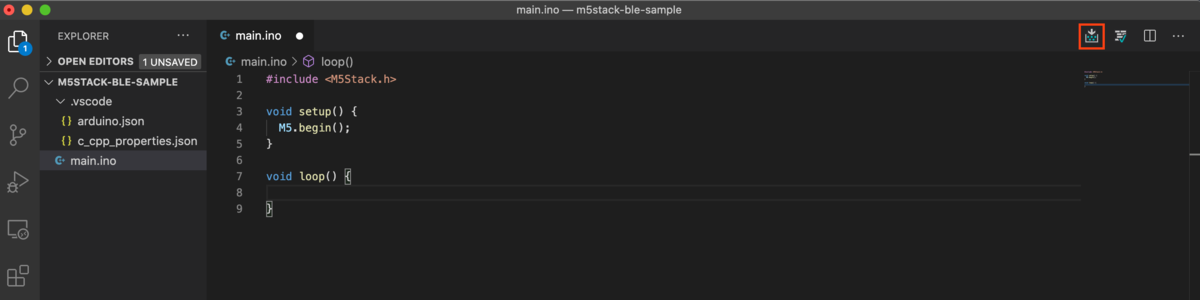
M5Stackへの書き込みを行う
右上隅の[Arduino: Upload]アイコンを選択するとコンパイルが行われ、M5Stackへの書き込みが行われる。
コマンドラインから書き込みを行う
前項まででvscodeで開発を行う環境を整えられた。 これに加えて、いくつかのプリプロセッサをデバッグ時のみ有効にする等の制御を行うためにコマンドラインからビルドを行いたい。 そのためにarduino-cliというツールを使う。 https://arduino.github.io/arduino-cli/latest/
arduino-cliのインストール
$ brew install arduino-cli
コンパイルは以下のコマンドで行える。
arduino-cli compile -b esp32:esp32:m5stack-core-esp32 your-directory-name
-bで書き込み対象のボードのfqbnを書く。このfqbnは.vscode/arduino.json > boardに書かれている内容を使っている。arduino-cliを使っても取れると思うのだが、うまく取得できなかったので、追って調査する。
もう1つの注意点はプロジェクトのディレクトリ名とinoファイル名の名前を一致させる必要があること。
コンパイルに成功すると、buildディレクトリ以下に成果物が出力される。
アップロードは以下のコマンド。
arduino-cli upload -b esp32:esp32:m5stack-core-esp32 -p /dev/cu.SLAB_USBtoUART
compileが成功し、build以下に成果物があればアップロードがされる。
これらを以下のようにMakefileにまとめた。
ARDUINO := arduino-cli
BOARD := esp32:esp32:m5stack-core-esp32
PORT := /dev/cu.SLAB_USBtoUART
PROJECT := $(shell basename "$$PWD")
BOARD_IN_PATH := $(subst :,.,$(BOARD))
PROJECT_DIR := $(abspath .)
DEFINES := -DDEBUG
BUILD_PROPERTIES = "build.defines=$(DEFINES)"

.PHONY: compile
compile:
$(ARDUINO) compile -b $(BOARD)
--build-properties $(BUILD_PROPERTIES)
$(PROJECT_DIR)

.PHONY: upload
upload:
$(ARDUINO) upload -b $(BOARD) -p $(PORT) -t $(PROJECT_DIR)

.PHONY: clean
clean:
rm -rf $(PROJECT_DIR)/build

.PHONY: all
all: compile upload clean

.DEFAULT_GOAL := all
これでコマンドラインからcompile and installができるようになった
itamaeでubuntuにdocker-engineを入れる
目標
ubuntuにdocker-engineを入れる作業はちょっとめんどいので自動化したい。
https://docs.docker.com/engine/installation/linux/ubuntu/#/install-using-the-repository で説明されている作業を自動化する
GPG key の 登録
apt_key_name = '2C52709D'
apt_key_keys = '58118E89F3A912897C070ADBF76221572C52609D'
apt_key_server = 'hkp://p80.pool.sks-keyservers.net:80'
execute "apt-key #{apt_key_name}" do
  command "apt-key adv --keyserver #{apt_key_server} --recv-keys #{apt_key_keys}"
  not_if "apt-key list | grep -q '\#{apt_key_name} '"
end
冪等性を保つために、未登録の場合だけ実行されるようにしたい。
登録された際のキー名は常に↑のようなので、apt-key listの結果を単に名前でgrepして登録済みの場合は実行されないようにした
リポジトリの追加
file '/etc/apt/sources.list.d/docker-engine.list' do
  owner 'root'
  group 'root'
  mode '644'
  content 'deb https://apt.dockerproject.org/repo ubuntu-xenial main'
end

execute 'apt-get update'
/etc/apt/sources.list.d/以下にリポジトリの設定ファイルを追加
apt-get updateを実行してリストを更新しておく
docker-engineのインストール
package 'docker-engine'
インストールはこれだけで良い
docker-engineをインストールするレシピとしてはここまでで良さそう。 有効にするのはrolesの責務なので、rolesのレシピに以下を書いてあげればOK
service 'docker' do
  action [:enable, :start]
end
お試し
Vagrantにxenial64を入れてためしてみる ファイルはそれぞれ以下。
Vagrantfile
Vagrant.configure('2') do |config|
  config.vm.box = 'ubuntu/xenial64'
  config.vm.network 'private_network', ip: '192.168.33.10'
end
recipe.rb
apt_key_name = '2C52709D'
apt_key_keys = '58118E89F3A912897C070ADBF76221572C52609D'
apt_key_server = 'hkp://p80.pool.sks-keyservers.net:80'
execute "apt-key #{apt_key_name}" do
  command "apt-key adv --keyserver #{apt_key_server} --recv-keys #{apt_key_keys}"
  not_if "apt-key list | grep -q '\#{apt_key_name} '"
end

file '/etc/apt/sources.list.d/docker-engine.list' do
  owner 'root'
  group 'root'
  mode '644'
  content 'deb https://apt.dockerproject.org/repo ubuntu-xenial main'
end

execute 'apt-get update'

package 'docker-engine'

service 'docker' do
  action [:enable, :start]
end
実行
$ bundle exec itamae ssh --vagrant recipe.rb
 INFO : Starting Itamae...
 INFO : Recipe: /Users/masaru-ichikawa/work/github/masarusanjp/infra/recipe.rb
 INFO :   execute[apt-key 2C52709D] executed will change from 'false' to 'true'
 INFO :   file[/etc/apt/sources.list.d/docker-engine.list] exist will change from 'false' to 'true'
 INFO :   file[/etc/apt/sources.list.d/docker-engine.list] modified will change from 'false' to 'true'
 INFO :   file[/etc/apt/sources.list.d/docker-engine.list] mode will be '0644'
 INFO :   file[/etc/apt/sources.list.d/docker-engine.list] owner will be 'root'
 INFO :   file[/etc/apt/sources.list.d/docker-engine.list] group will be 'root'
 INFO :   diff:
 INFO :   --- /dev/null 2017-02-19 11:16:35.984000000 +0000
 INFO :   +++ /tmp/itamae_tmp/1487503268.593038 2017-02-19 11:21:07.271074457 +0000
 INFO :   @@ -0,0 +1 @@
 INFO :   +deb https://apt.dockerproject.org/repo ubuntu-xenial main
 INFO :   \ No newline at end of file
 INFO :   execute[apt-get update] executed will change from 'false' to 'true'
 INFO :   package[docker-engine] installed will change from 'false' to 'true'
無事に成功したので、仮想マシンに入ってdockerを実行してみる
$ vagrant ssh
Welcome to Ubuntu 16.04.1 LTS (GNU/Linux 4.4.0-59-generic x86_64)

ubuntu@ubuntu-xenial:~$ sudo docker run hello-world
Unable to find image 'hello-world:latest' locally
latest: Pulling from library/hello-world
78445dd45222: Pull complete
Digest: sha256:c5515758d4c5e1e838e9cd307f6c6a0d620b5e07e6f927b07d05f6d12a1ac8d7
Status: Downloaded newer image for hello-world:latest

Hello from Docker!
This message shows that your installation appears to be working correctly.

To generate this message, Docker took the following steps:
 1. The Docker client contacted the Docker daemon.
 2. The Docker daemon pulled the "hello-world" image from the Docker Hub.
 3. The Docker daemon created a new container from that image which runs the
    executable that produces the output you are currently reading.
 4. The Docker daemon streamed that output to the Docker client, which sent it
    to your terminal.

To try something more ambitious, you can run an Ubuntu container with:
 $ docker run -it ubuntu bash

Share images, automate workflows, and more with a free Docker ID:
 https://cloud.docker.com/

For more examples and ideas, visit:
 https://docs.docker.com/engine/userguide/
おわり
というわけで、docker-engineを入れるレシピが作れた。